Development, Exaud Insights
Data Binding on RecyclerView
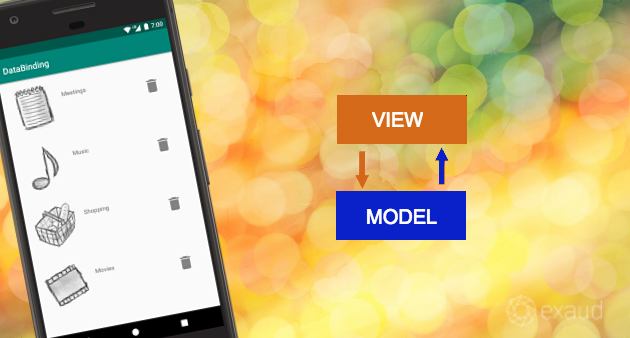
On my last article, I explained how to start using Data Binding on an Android project, using as an example an app to create notes.
Today, I will show you how to use Data Binding on RecyclerView. Continue reading to know more.
RECYCLERVIEW
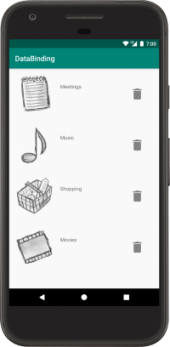
Using Data Binding on RecyclerView is very simple and clean. The layout setup is identical to the previous one but in this case, we should have an item layout that defines the necessary variables in the data element. Doing the necessary changes to the Adapter is not very hard:
public class NotesAdapter extends RecyclerView.Adapter<NotesAdapter.NoteViewHolder> {

private List<Note> mNotes;

    public NotesAdapter(List<Note> notes) {
        mNotes = notes;
    }

    @Override
    public NoteViewHolder onCreateViewHolder(ViewGroup parent, int viewType) {
        LayoutInflater layoutInflater = LayoutInflater.from(parent.getContext());
        ItemNoteBinding itemNoteBinding = ItemNoteBinding.inflate(layoutInflater, parent, false);
        return new NoteViewHolder(itemNoteBinding);
    }

    @Override
    public void onBindViewHolder(NoteViewHolder holder, int position) {
        Note note = mNotes.get(position);
        holder.bind(note);
    }

    @Override
    public int getItemCount() {
        return mNotes.size();
    }

    class NoteViewHolder extends RecyclerView.ViewHolder {

        ItemNoteBinding binding;

        NoteViewHolder(ItemNoteBinding binding) {
            super(binding.getRoot());
            this.binding = binding;
        }

        void bind(Note note) {
            binding.setNote(note);
            binding.executePendingBindings();
        }
    }
}
On onCreateViewHolder, we inflate the layout using the inflate method on ItemNoteBinding class, which already contains the right references to the layout item_note.xml.
On onBindViewHolder, we bind each Note to the respective RecyclerView item. Note that using Data Binding avoids all the boilerplate of adding the findViewById() for all the items Views, as this is implicitly binded by the generated ItemNoteBinding.
BINDING ADAPTER
Data Binding Library is so focused on simplifying the extra work needed, that among several features, there are binding adapters to add attributes to Views on layouts, which will transform the parameters into a desirable result. In this example, we will use an URL for an Image and display it directly to an ImageView, using Picasso:
    @BindingAdapter({"imageUrl"})
    public static void loadImage(ImageView view, String url) {
        Picasso.get().load(url).into(view);
    }
Once we add this method with the respective BindingAdapter annotation, it can be invoked in a layout. After that, the generated classes by Data Binding will ensure this method is properly invoked. In order to apply into a View, we just need to add a Data Binding expression:
...
    <ImageView app:imageUrl="@{note.image}" … />
...
IMPORTS
If there is the need to use Android Java classes on any Data Binding expression, it is easy to make that class available. Simply add that class as an import inside the data tag.
…
    <data>
        <import type="android.view.View" />
        ...
    </data>
    <LinearLayout ...
        <ImageView android:visibility="@{note.image != null ? View.VISIBLE : View.GONE}" … />
    </ LinearLayout>
...
EVENT HANDLING
We are going to add a new Button to each Note that allows deleting this Note. This will require to also bind the NotesAdapter to our layout. To do this, we need to add a new variable to the data tag:
…
    <data>
        ...
        <variable name="callback" type="com.exaud.databinding.NotesAdapter" />
    </data>
...
In the NotesAdapter, we want to have a way to delete an Item by the Object:
    public void removeNote(Note note) {
        int position = mNotes.indexOf(note);
        mNotes.remove(position);
        notifyItemRemoved(position);
    }
Now, we can add the Delete button to the layout and assign the click to removeNote() method. In order to apply the onClick directly to our method, we need to use a lambda that calls the removeNote() method with a Note parameter
...
    <Button android:onClick="@{() -> callback.removeNote(note)}" …  />
...
There is one last step required before we have a working button. We need to bind the adapter into our layout. For this, simply add that into the bind() method, by setting the callback variable of the layout:
...
    void bind(Note note) {
        binding.setNote(note);
        binding.setCallback(NotesAdapter.this);
        binding.executePendingBindings();
    }
…
Despite all the information covered in this tutorial, there is still much more functionality on Data Binding Library that we could discuss. If you want to learn more, check the official documentation or reach me at andre@exaud.com

Related posts

AI, Development, Exaud Insights
AI Insights: Our Team’s Perspectives
We’ve had a chat with some of our team members to understand what they think about AI. They’ve shared their thoughts on what they’re curious about, what problems they’d like to solve, and how they feel about the future of AI.

Embedded, Exaud Insights
Safeguarding Critical Infrastructure: Addressing Security Concerns in Embedded Systems
Explore practical solutions to secure your organization’s connected devices. Learn about top security concerns and how to address them.

AI, Exaud Insights, Unity
Unlocking the Future: AI Tools Revolutionizing Unity Game Development
Discover how AI tools are reshaping Unity game development, engaging players, and enhancing game quality.

Exaud Insights
The Must-Read Tech Books That Defined 2023 – Part II
We’re onto Part II of our top tech books for 2023, covering AI, Data, and Technology.

Exaud Insights
The Must-Read Tech Books That Defined 2023 – Part I
Explore the 10 must-read tech books of the year, delving into the transformative power of technology and its impact on work and society.
Comments are closed