Exaud Blog
Blog

ConstraintLayout – Better Late than Never
ConstraintLayout is used to define a layout by assigning constraints for every child view/widget relative to other views present. Posted onby André LopesIt’s no news that ConstraintLayout was the latest addition to Android’s layouts collection. It was presented at Google I/O 2016 and released last March, as version 1.0, along with Android Studio 2.3. However, I bet there are a few Android developers who, like me, have never experienced the usefulness of this powerful resource. If you’re one of them, here’s your chance.
Why I Changed My Mind
I changed my mind recently when I tried to use the Visual Editor, for the first time in probably 2 or 3 years, to create a layout by dragging and dropping Views. Although ConstraintLayout isn’t the most intuitive tool to use, after learning the basics, I quickly fell in love with it to the point of becoming an addiction.
Pros & Cons
Android ConstraintLayout is used to define a layout by assigning
constraints for every child view/widget relative to other views present.
It gives the easiness of visual editing of Android Studio, the
powerfulness of the Constraints to organize the Views and a bunch of small
features that added up, simplify the construction of complex layouts. This
make us wonder when this isn’t the right tool for the job.
One of its selling point is that it uses a single instance to organize all the Views, instead of nesting LinearLayouts and/or RelativeLayouts. While this seems very nice, we must be aware that there are a few performance issues, mainly if we fall into the trap of using several ConstraintLayouts when building multiple containers. Although its performance is being constantly improved, we should consider simpler layouts, such as LinearLayout or Custom Views, when creating a simple UI.
How To Use It
Following up, I show the solution for two difficult problems that would be a headache to overcome without ConstraintLayout.
Building Layouts with Squared Views
We were all faced with UIs with squared views (photos, containers, etc.)
that required to set a value on dimens.xml to be used for width and height
and afterwards properly scaled for the targeted devices. If sometimes it
was possible to achieve pure bliss in the the whole range of testing
devices, other times the margins just took care of managing the remaining
space around the squared views.
This headache is now easily solved. The property
app:layout_constraintDimensionRatio ensures the View is
properly scaled to the defined space and renders it with the same height
as the width.
<android.support.constraint.ConstraintLayout
    xmlns:android="http://schemas.android.com/apk/res/android"
    xmlns:app="http://schemas.android.com/apk/res-auto"
    android:layout_width="match_parent"
    android:layout_height="wrap_content"
    app:layout_constraintEnd_toEndOf="parent"
    app:layout_constraintStart_toStartOf="parent">

    <ImageView
        android:id="@+id/imageview1"
        android:layout_width="0dp"
        android:layout_height="0dp"
        android:src="@mipmap/ic_launcher_round"
        app:layout_constraintDimensionRatio="1"
        app:layout_constraintEnd_toStartOf="@id/imageview2"
        app:layout_constraintStart_toStartOf="parent" />

    <ImageView
        android:id="@+id/imageview2"
        android:layout_width="0dp"
        android:layout_height="0dp"
        android:src="@mipmap/ic_launcher"
        app:layout_constraintDimensionRatio="1"
        app:layout_constraintEnd_toEndOf="parent"
        app:layout_constraintStart_toEndOf="@id/imageview1" />

android.support.constraint.ConstraintLayout>
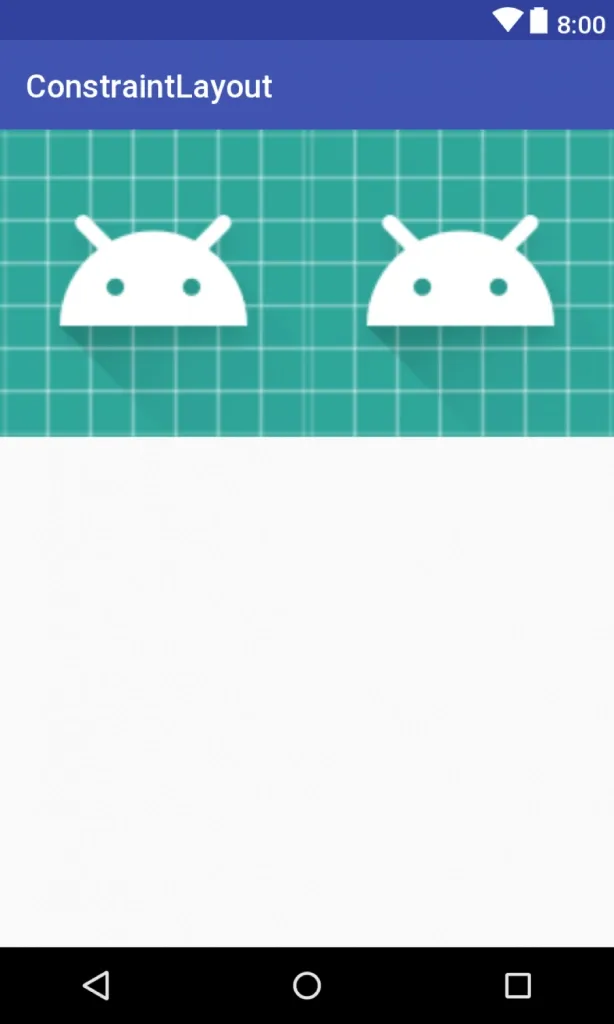
In order to create the squared effect, the
app:layout_constraintDimensionRatio should have a value in
the format width:height or the value of the ratio between
width and height. Make sure to assign 0dp to width and height. In
ConstraintLayout, 0dp means MATCH_CONSTRAINT. In this example we’re also
chaining the two Views, side by side, by adding a bi-directional
connection.

Dynamic Layouts based on ConstraintLayout
With a ConstraintLayout is possible to dynamically load a layout with
Views that follow unconventional constraints. In case it is required to
have a more complex UI, than what an Adapter can do in a RecyclerView, we
might have ConstraintLayout ready to save the day.
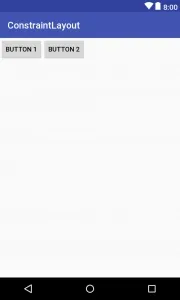
In order to programmatically add Constraints between Views, we can use a ConstraintSet which will be set on the ConstraintLayout, enforcing all the required rules. In this case, I just want to mimic a RelativeLayout organization between the Views, which can be afterwards enhanced with additional Constraints using this Layout.
private void buildDynamicConstraintLayout() {
    // ConstraintLayout
    ConstraintLayout constraintLayout = findViewById(R.id.constraintlayout);

    // Create Button 1
    Button button1 = new Button(this);
    // Generate an Id and assign it to programmatically created Button
    button1.setId(View.generateViewId());
    button1.setText("Button 1");
    button1.setLayoutParams(new ConstraintLayout.LayoutParams(
            ViewGroup.LayoutParams.WRAP_CONTENT, ViewGroup.LayoutParams.WRAP_CONTENT));
    // Add programmatically created Button to ConstraintLayout
    constraintLayout.addView(button1);

    // Create Button 1
    Button button2 = new Button(this);
    // Generate an Id and assign it to programmatically created Button
    button2.setId(View.generateViewId());
    button2.setText("Button 2");
    button2.setLayoutParams(new ConstraintLayout.LayoutParams(
            ViewGroup.LayoutParams.WRAP_CONTENT, ViewGroup.LayoutParams.WRAP_CONTENT));
    // Add programmatically created Button to ConstraintLayout
    constraintLayout.addView(button2);

    // Create ConstraintSet
    ConstraintSet constraintSet = new ConstraintSet();
    // Make sure all previous Constraints from ConstraintLayout are not lost
    constraintSet.clone(constraintLayout);

    // Create Rule that states that the START of Button 1 will be positioned at the END of Button 2
    constraintSet.connect(button2.getId(), ConstraintSet.START, button1.getId(), ConstraintSet.END);
    constraintSet.applyTo(constraintLayout);
}
 [/[/[/
Feel free to reach me at andre[at]exaud[dot]com, I’m happy to get your feedback and further discuss this topic.[/[/[/
Related Posts
Subscribe for Authentic Insights & Updates
We're not here to fill your inbox with generic tech news. Our newsletter delivers genuine insights from our team, along with the latest company updates.